
introduction
Dutch oven camp dinners turn simple campfire meals into rich, flavorful experiences. I’m Chef Ruby, creator of Zestolla, where my years in professional kitchens meet my passion for sharing easy, trendy recipes. With just a Dutch oven, some fresh ingredients, and a glowing campfire, you can create restaurant-quality meals in the great outdoors.
In this guide, I’ll share the best gear, recipes, tips, and tricks to make your Dutch oven camp dinners easy, delicious, and memorable. From hearty stews to sweet cobblers, let’s bring bold flavors to your next camping trip.
Looking for inspiration? Try Ditalini Elote Pasta Salad: The Irresistible Summer Fusion Everyone’s Obsessed With for a perfect campfire side.
Looking for more outdoor food inspiration? Follow me on Pinterest where I share exclusive campfire cooking boards.
table of contents
Table of Contents
The Charm of Dutch Oven Camp Dinners
What Makes Dutch oven camp dinners Cooking Perfect for Camping?
There’s a reason Dutch ovens have been a staple of campfire cooking for generations. These heavy cast-iron pots distribute heat evenly, allowing you to roast, bake, stew, and simmer over open flames or hot coals with impressive consistency. The tightly sealed lid locks in moisture, transforming basic ingredients into deeply flavorful, tender dishes that warm you from the inside out.
As someone who’s spent years perfecting flavors in professional kitchens, I can tell you—sometimes, simplicity creates the boldest results. The Dutch oven allows campers to enjoy gourmet-quality meals outdoors, without complicated gear or electricity. It’s rustic, it’s rewarding, and it connects you to food in a way modern kitchens rarely do.
The Unique Flavor and Experience of Campfire Cooking
Campfire cooking isn’t just about feeding your group—it’s about creating an experience. The aroma of wood smoke blending with simmering stew, the glow of embers under a starlit sky, the anticipation of lifting the lid to reveal your perfectly cooked meal—Dutch oven camp dinners turn cooking into a memorable event.
The gentle infusion of smoky flavor from real wood or charcoal adds an earthy, rich depth to your dishes that even the finest indoor ovens can’t replicate. And unlike the rushed pace of everyday life, Dutch oven cooking encourages you to slow down, enjoy the process, and fully savor every bite. That’s what cooking at its best is really about—whether it’s in a Michelin-starred restaurant or around a crackling campfire.
Essential Dutch Oven Gear for Camp Cooking
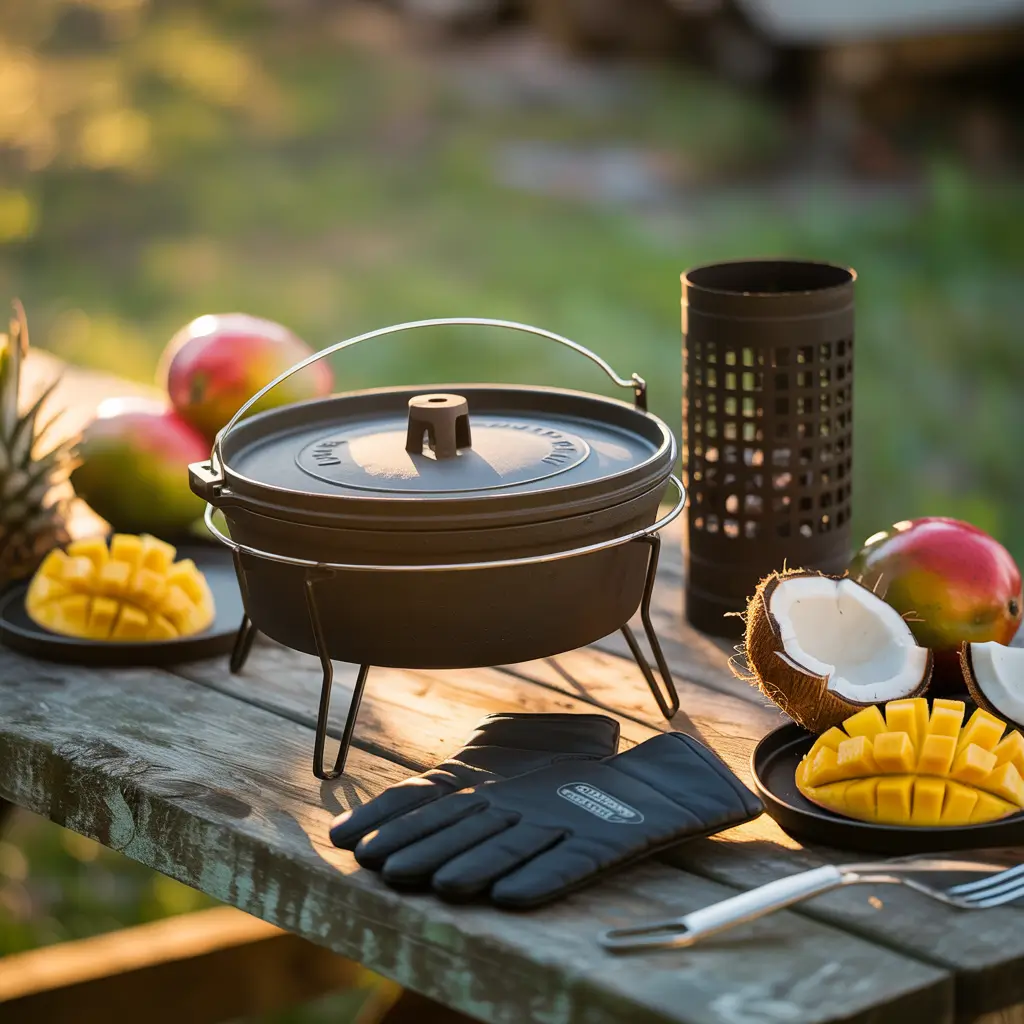
Choosing the Right Dutch Oven for Camping
When it comes to Dutch oven camp dinners, your choice of gear matters. A traditional cast iron Dutch oven is ideal for campfire cooking thanks to its durability and superior heat retention. For outdoor use, always select a model with three key features:
- Legs: These allow the Dutch oven to sit securely over hot coals.
- Flanged lid: The raised edge holds coals on top, providing even heat from both above and below — perfect for baking.
- Sturdy handle: Essential for lifting with a hook or tripod.
Size matters, too. A 10- or 12-inch Dutch oven is typically perfect for feeding a family or small group, while larger models suit bigger gatherings. Enameled Dutch ovens are better suited for kitchen use; stick to bare cast iron for campsite durability.
Must-Have Accessories for Successful Dutch oven camp dinners
Although the Dutch oven takes center stage in your camp kitchen, adding a few handy accessories can elevate your outdoor cooking experience even more:
- Lid lifter: Safely remove the hot lid without risking burns.
- Tripod or grill grate: Lets you suspend or place your Dutch oven right above the flames for perfect heat control.
- Charcoal chimney starter: Helps you light coals evenly for consistent heat.
- Heat-resistant gloves: Protect your hands when handling hot iron and coals.
- Heavy-duty tongs: Make repositioning coals quick and easy.
Investing in quality tools ensures safer, more enjoyable outdoor cooking and lets you focus on creating unforgettable meals.
Check out La Scala Restaurant Chopped Salad: The Legendary Beverly Hills Favorite for a refreshing camp-friendly salad to pair with your Dutch oven feast.
How to Use a Dutch Oven at the Campsite
Mastering Heat Control: Coals, Fire, and Temperature
The secret to perfect Dutch oven camp dinners is heat management. Unlike your kitchen stove, controlling heat outdoors requires a bit of practice, but it’s easy once you understand the basics.
For most Dutch oven camp dinners recipes, you’ll use hot charcoal briquettes placed both under and on top of the Dutch oven. A common rule is to place twice as many coals on top as below for even baking and roasting. For example, if you’re using 24 coals total, place 16 on the lid and 8 underneath. This creates balanced top-down heat that mimics an oven.
A simple rule of thumb is the « Rule of 3 » — take the oven’s diameter, double it for the total number of coals, then place one-third underneath and two-thirds on top. For a 12-inch Dutch oven:
- 12 (diameter) x 2 = 24 coals total
- 8 coals under, 16 coals on top
You can also adjust as needed. Windy or cold conditions may require extra coals, while sensitive recipes like biscuits may need less bottom heat to avoid burning.
Safety Tips for Dutch Oven Cooking in the Wild
Safety is just as important as flavor when preparing Dutch oven camp dinners. Always place your cooking area away from tents, dry grass, or flammable materials. Always keep a bucket of water or sand within reach to quickly put out any unexpected flare-ups.
Use long-handled tools to avoid burns and wear heat-resistant gloves when handling the hot lid or pot. If you’re cooking directly over wood fire coals, make sure they’re fully burned down to glowing embers for even heat distribution.
Never leave your Dutch oven unattended, especially when children or pets are around. With the right care and attention, Dutch oven cooking is both safe and incredibly rewarding.
Don’t miss our 15 Best Snacks That is High In Protein To Boost Energy & Curb Cravings for energy-packed bites perfect before or after your Dutch oven meal
Best Dutch Oven Camp Dinner Recipes
Hearty One-Pot Stews and Chili
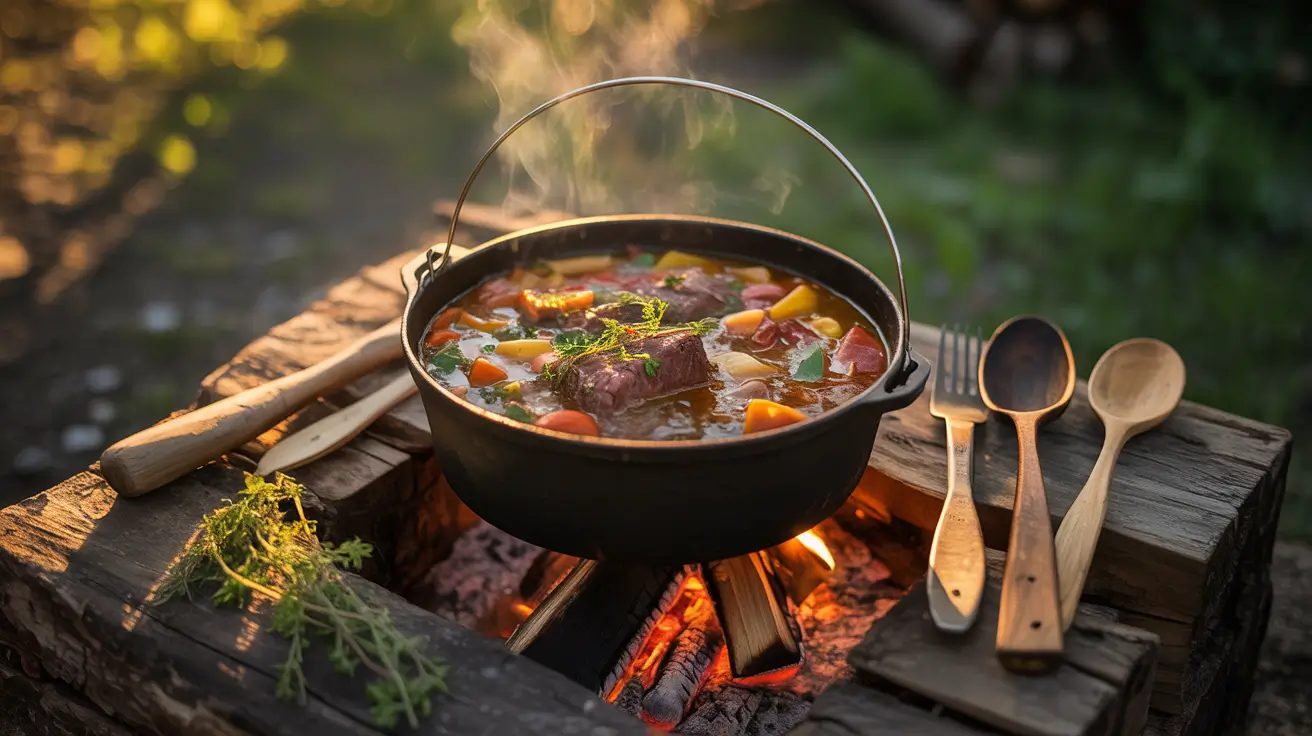
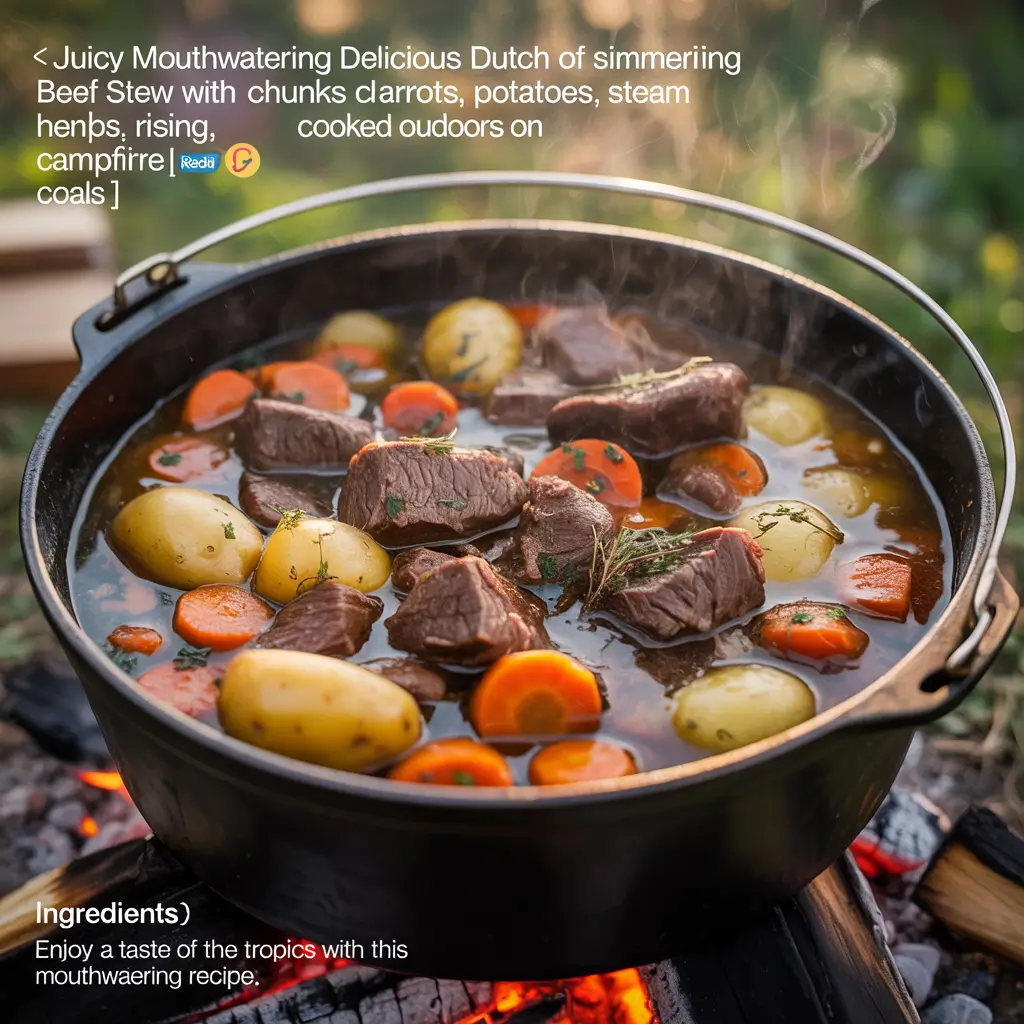
When it comes to Dutch oven camp dinners, few dishes satisfy like a rich stew or spicy chili simmered over glowing coals. The cast iron retains steady heat, allowing flavors to meld beautifully as the meat tenderizes and the sauce thickens.
Beef Stew: Start by searing chunks of beef with onions and garlic directly in your Dutch oven. Add chopped carrots, potatoes, and celery. Pour in beef broth, a splash of red wine, and season generously with thyme, rosemary, and bay leaves. Cover and let it slow cook for 2-3 hours over gentle coals.
Campfire Chili: Brown ground beef or turkey with diced onions and bell peppers. Stir in canned tomatoes, kidney beans, black beans, and your favorite chili spices — cumin, paprika, and a bit of cayenne for heat. Let it gently simmer for at least an hour, giving it an occasional stir, until it reaches a thick, rich consistency.
Both meals are simple, comforting, and perfect after a long day outdoors.
Savory Roasts, Bakes, and Casseroles
Your Dutch oven camp dinners don’t have to stop at stews. The even heat of cast iron makes it ideal for roasting and baking as well.
Roast Chicken: Season a whole chicken with salt, pepper, garlic, and fresh herbs. Set it on a layer of hearty root veggies such as carrots, potatoes, and onions. Secure the lid, distribute hot coals evenly on top and underneath, and roast for 90 minutes until tender, juicy, and beautifully golden.
Chicken and Rice Bake: Sauté diced chicken, onions, and bell peppers in your Dutch oven. Mix in the raw rice along with broth, chopped tomatoes, and your chosen spices. Cover and let cook for about 45 minutes, until the rice is fluffy and the flavors have blended perfectly.
These all-in-one dishes keep camp cooking simple while delivering bold, satisfying flavors every time.
Discover great ideas like Cottage Cheese Dip with Ranch – The Best High-Protein Snack You’ll Ever Try to enjoy as a light appetizer before your hearty Dutch oven meal.
Dutch oven camp dinners Baking at the Campsite
Breads, Biscuits, and Cobblers Made Easy
One of the most exciting parts of Dutch oven camp dinners is the ability to bake right at your campsite. The Dutch oven’s heat distribution makes it perfect for rustic baked goods.
Campfire Bread: Mix flour, yeast, water, salt, and a bit of sugar to form a simple dough. Let it rise while you prepare the fire. Gently place the dough in a well-oiled Dutch oven, cover it, and bake using coals above and below for 30 to 40 minutes. The outcome is a rustic, golden loaf with a crunchy crust and tender center — ideal for soaking up hearty stews.
Drop Biscuits: Combine flour, baking powder, salt, cold plant-based butter, and milk to make a quick biscuit dough. Drop spoonfuls onto parchment inside your Dutch oven. Bake for 20-25 minutes with coals balanced top and bottom for fluffy, golden biscuits that pair perfectly with any meal.
Campfire Peach Cobbler: Pour canned or fresh peaches into the Dutch oven. Top with a mixture of flour, oats, brown sugar, baking powder, cinnamon, and plant-based butter. Cover and bake with plenty of top coals for 35-45 minutes. The warm, bubbly fruit and golden topping make this a crowd-pleasing dessert under the stars.
Desserts to Impress Your Camp Group
For a sweet ending to your Dutch oven camp dinners, simple desserts can feel gourmet when cooked over a campfire.
Chocolate Lava Cake: Pour chocolate cake batter into your Dutch oven, spoon in a few dollops of chocolate spread into the center, and bake with balanced coals for about 30 minutes. The result? Gooey, decadent chocolate with minimal effort.
Apple Crisp: Toss sliced apples with sugar and cinnamon. Top with a crumbly mixture of oats, flour, sugar, and butter. Bake until bubbling and golden for a cozy, classic camp dessert.
Baking with a Dutch oven camp dinners might sound intimidating, but once you master your coal placement, it becomes one of the most rewarding parts of outdoor cooking.
Don’t miss our Milk Chocolate with Pistachio: The Viral Sensation You Need to Taste Today for more dessert inspiration you can adapt for camping!
Understanding the Rule of 3 in Dutch Oven Cooking
What Is the Rule of 3?
Every serious camper who prepares Dutch oven camp dinners eventually learns the Rule of 3. It’s a simple method for controlling temperature with charcoal briquettes, ensuring even cooking no matter what you’re making. The rule states:
Take the diameter of your Dutch oven, multiply it by two to get the total number of briquettes, then place one-third of them underneath and two-thirds on top.
For example:
- A 12-inch Dutch oven:
- 12 x 2 = 24 total briquettes
- 8 underneath
- 16 on top
This formula provides a steady, even heat that’s perfect for baking casseroles, roasting meats, or cooking stews. While it may sound overly precise for a campfire, it’s an incredibly reliable starting point for beginners and pros alike.
How to Apply Dutch oven camp dinners for Consistent Results
The Rule of 3 works well for most Dutch oven camp dinners, but you may need to adjust slightly based on weather, altitude, and the recipe. If it’s windy or cold, add a few extra coals to maintain heat. If you’re baking delicate items like biscuits or cobblers, place fewer coals underneath to prevent burning the bottom while still applying sufficient top heat for even browning.
Always preheat your Dutch oven camp dinners before adding your ingredients to ensure an even cook from the start. Rotate the lid and base occasionally to balance hot spots caused by uneven coal placement or wind direction.
With practice, you’ll be able to eyeball the perfect coal count, but sticking to the Rule of 3 ensures reliable, delicious results every time you cook outdoors.
How to Clean, Care for, and Store Your Dutch Oven After Campfire Dutch Oven camp Dinners
Easy Cleaning After Campfire Dutch Oven Dinners
After savoring your delicious campfire Dutch oven camp dinners, it’s time to give your cast iron some well-deserved attention. Fortunately, cleaning your Dutch oven isn’t complicated — and with a few simple habits, you’ll keep it performing like new.
- Let it cool first: Never pour cold water into a hot Dutch oven—it can cause thermal shock, potentially cracking the iron.
- Scrape off food bits: Once it’s warm (but not hot), gently scrape out any leftover food using a wooden spoon or plastic scraper.
- Rinse with warm water only: Avoid using soap, which can strip away the protective seasoning layer. Instead, swish warm water inside and loosen any remaining food particles.
- For stubborn, stuck-on residue: Sprinkle some coarse salt into the pot and gently scrub with a soft cloth or brush. The salt works as a mild abrasive, lifting debris without harming the surface.
- Ensure it’s completely dry: Moisture is cast iron’s biggest enemy. After drying with a cloth, set the Dutch oven over low heat for a few minutes to eliminate any remaining moisture.
- Lightly oil the surface: Once fully dry, apply a thin, even layer of vegetable oil or cast iron conditioner to maintain the seasoning and protect against rust.
Consistent, gentle care keeps your Dutch oven ready for many more Dutch oven camp dinners under the stars.
Storing Your Dutch Oven Safely Between Adventures
Proper storage is just as important as cleaning. Once your Dutch oven is seasoned and dry, store it in a cool, dry spot to prevent rust or moisture damage. Leave the lid slightly cracked or place a folded paper towel between the lid and pot. This allows air circulation and keeps moisture from building up inside.
For long-term storage—especially if you won’t use it for months—apply a very light coat of oil and place it inside a breathable bag or plastic bin to shield it from dust and humidity.
When cared for correctly, a cast iron Dutch oven can last for generations, becoming an essential part of your campfire Dutch oven camp dinners tradition.
Frequently Asked Questions (FAQ)
What to cook in a camp Dutch oven?
You can cook stews, chili, roasted meats, casseroles, baked goods, and even desserts. Dutch ovens handle almost any campfire-friendly recipe.
Are Dutch ovens and camp ovens the same thing?
Absolutely. Cast iron Dutch ovens are built for campfires, providing even heat for roasting, stewing, and baking outdoors.
What is the Rule of 3 Dutch oven?
The Rule of 3 helps manage coal placement: use twice your oven’s diameter in total coals, with one-third underneath and two-thirds on top.
Is a Dutch oven the same as a camp oven?
Not exactly. Dutch ovens are heavy cast iron pots designed for open fire, while « camp oven » may refer to lighter portable models for controlled heat sources like propane.
Conclusion
Dutch oven camp dinners combine rustic simplicity with unforgettable flavors, transforming any campsite into a gourmet kitchen under the stars. With the right gear, basic techniques, and a little practice, you’ll quickly master the art of Dutch oven cooking and create campfire meals your group will crave on every adventure.
Discover great ideas like Boiled Onion Gravy Recipe: The Most Flavorful 3-Step Sauce You’ll Ever Make to elevate your next campfire meal even further.
Connect with me directly on Facebook to share your own Dutch oven camp creations and get fresh ideas for your next trip!