
Artisan Bread Recipes for Dutch Oven: The Best Homemade Loaf You’ll Ever Bake
Introduction
Welcome to Zestolla — where passion meets precision in the kitchen. I’m Ruby, a professional chef who traded the busy restaurant world for this flavorful corner of the internet. Here, I blend years of culinary expertise with a love for trending recipes that anyone can master at home. Today, we’re diving into one of my absolute favorites: artisan bread recipes for Dutch oven baking. Whether you’re a seasoned baker or just starting your sourdough journey, this guide is packed with foolproof methods, pro tips, and flavorful ideas to help you create bakery-quality artisan bread right from your kitchen. Let’s fire up that Dutch oven and get baking!
table of contents
Table of Contents
The Magic of artisan bread recipes for Dutch oven
What Makes artisan bread recipes for Dutch oven Special?
Artisan bread goes far beyond a simple mix of flour, water, salt, and yeast — it’s a true expression of craftsmanship. The term « artisan » refers to bread made by hand using traditional methods, often with minimal ingredients but maximum care. What sets artisan bread recipes for Dutch oven apart is its rustic, golden crust, open crumb structure, and complex flavors developed through slow fermentation. Unlike mass-produced loaves, artisan bread often boasts a chewy texture, irregular air pockets, and a rich, slightly tangy taste that only time and technique can create.
In professional kitchens, we cherish artisan bread for its simplicity and depth. It’s all about developing the gluten properly, allowing the dough to ferment slowly, and achieving that beautiful balance between crusty exterior and tender interior.
Why the Dutch Oven is Perfect for Artisan Bread Baking
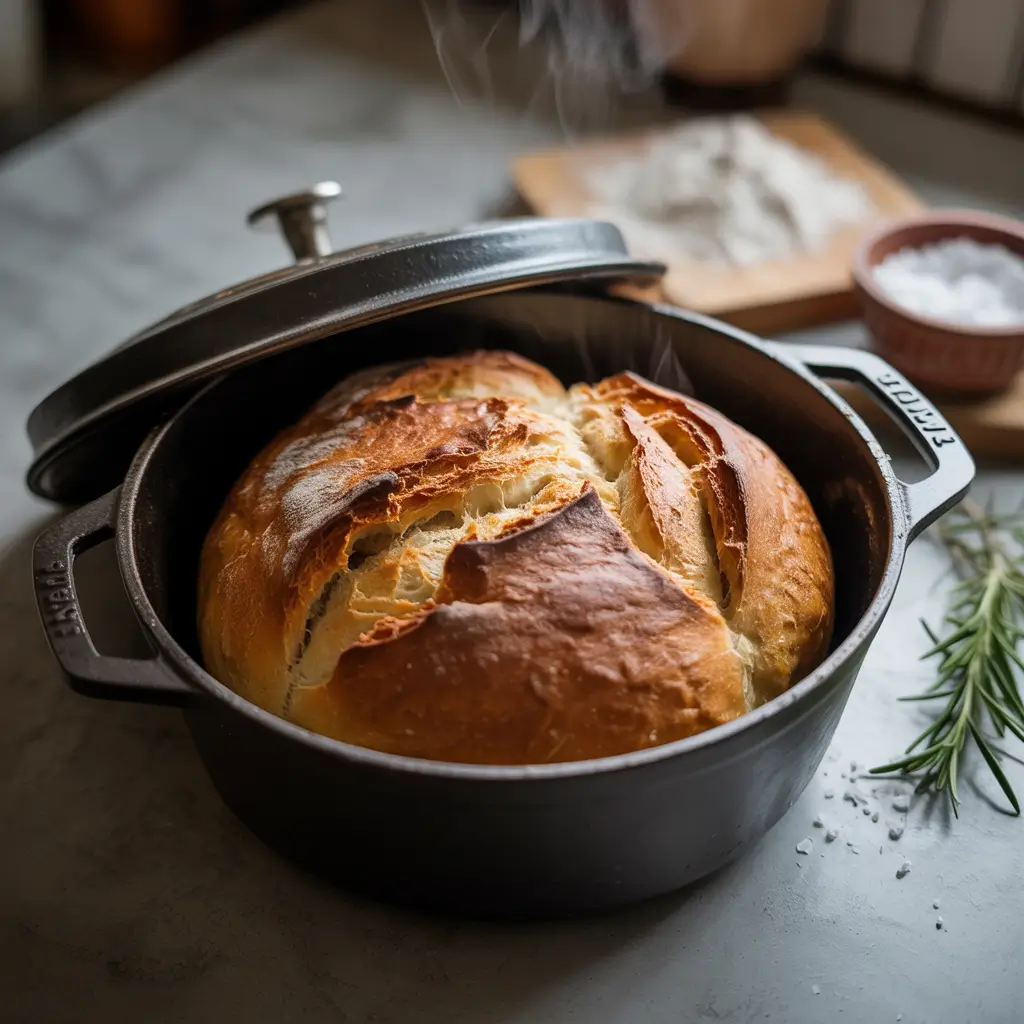
The Dutch oven has earned its place as the home baker’s secret weapon for artisan bread. The thick cast-iron construction distributes heat consistently throughout the baking process, while the snug lid locks in moisture at the start. This trapped steam plays a vital role, giving the dough the chance to expand completely before the crust firms up, resulting in a tall, airy loaf with an irresistibly crisp, crackling crust.
In restaurant kitchens, we rely on steam-injected ovens to achieve this effect. At home, the Dutch oven mimics this environment perfectly. The enclosed space creates the ideal conditions for oven spring, giving you that signature artisan look and feel with every bake.
Essential Ingredients for Perfect artisan bread recipes for Dutch oven
The Role of Flour, Water, Yeast, and Salt
At the heart of every artisan bread recipe for Dutch oven baking are just four simple ingredients: flour, water, yeast, and salt. But don’t let the simplicity fool you—each plays a crucial role in creating the perfect loaf.
Flour provides structure. For most artisan bread recipes for Dutch oven, bread flour is ideal due to its higher protein content, which helps develop gluten. Gluten forms the web-like network that traps gases, giving your bread its chewy interior and lovely rise.
Water activates the flour and dissolves the other ingredients. The amount of water you use affects the dough’s hydration level—a higher hydration dough leads to a more open crumb with those desirable air pockets you see in artisan loaves.
Yeast is the engine behind fermentation. It consumes sugars and produces carbon dioxide, which causes the dough to rise. Depending on your chosen method, you might use commercial yeast or a natural starter for sourdough.
Salt does more than season; it strengthens the gluten network and controls fermentation. Without salt, the dough can ferment too quickly, leading to an overproofed, flat loaf.
Choosing the Best Yeast for Artisan Bread
When it comes to yeast, you have options, and choosing the right one can significantly impact your results.
- Active Dry Yeast: This is a reliable choice for most home bakers. It requires blooming in warm water before use, ensuring it’s fully activated.
- Instant Yeast: Also known as rapid-rise yeast, this doesn’t need pre-proofing and can be mixed directly into dry ingredients.
- Sourdough Starter: The gold standard for artisan bread lovers. It provides complex, tangy flavors and a chewier crumb. Using a starter takes more time and care but rewards you with unmatched taste.
For many beginners, instant yeast is the easiest starting point. As your confidence grows, experimenting with a sourdough starter can elevate your artisan bread recipes for Dutch oven baking to a whole new level.
Selecting the Right artisan bread recipes for Dutch oven
What Size Dutch Oven Is Ideal for Artisan Bread?
Choosing the right Dutch oven is crucial for successful artisan bread recipes for Dutch oven baking. The size directly affects how your loaf bakes and how it expands during oven spring.
A 5 to 6-quart Dutch oven is the sweet spot for most standard artisan loaves. It’s large enough to accommodate the dough’s rise without restricting its shape but not so big that the steam disperses too quickly. Too small, and your bread might stick to the sides or bake unevenly; too large, and you lose the steam-trapping benefits that give artisan bread its gorgeous crust.
If you plan to bake larger or double batches, a 7 or 8-quart Dutch oven offers extra space, but for most home bakers, sticking with 5 to 6 quarts ensures reliable results every time.
Material and Shape: Cast Iron vs. Enameled Dutch Ovens
When selecting your Dutch oven, you’ll encounter two main types: bare cast iron and enameled cast iron. Both options are effective, but each comes with its own set of advantages and drawbacks.
Cast Iron Dutch Ovens:
- Excellent heat retention and distribution
- Durable and long-lasting
- Require seasoning to maintain a non-stick surface
- Can handle extremely high temperatures
Enameled Dutch Ovens:
- Easier to clean and maintain
- No seasoning required
- Slightly more delicate—avoid metal utensils to prevent chipping
- Also great for multi-purpose cooking beyond bread
As for shape, round Dutch ovens are ideal for artisan bread. They encourage even expansion, while oval models can sometimes create uneven crusts due to elongated heat distribution.
Whichever type you choose, make sure it has a tight-fitting lid to trap steam effectively—this is the secret to achieving that beautiful artisan crust.
Try more creative ideas on https://www.zestolla.com/la-scala-restaurant-chopped-salad/
Mastering the Dough: Preparation and Techniques
Hydration Levels and Their Impact on Bread Texture
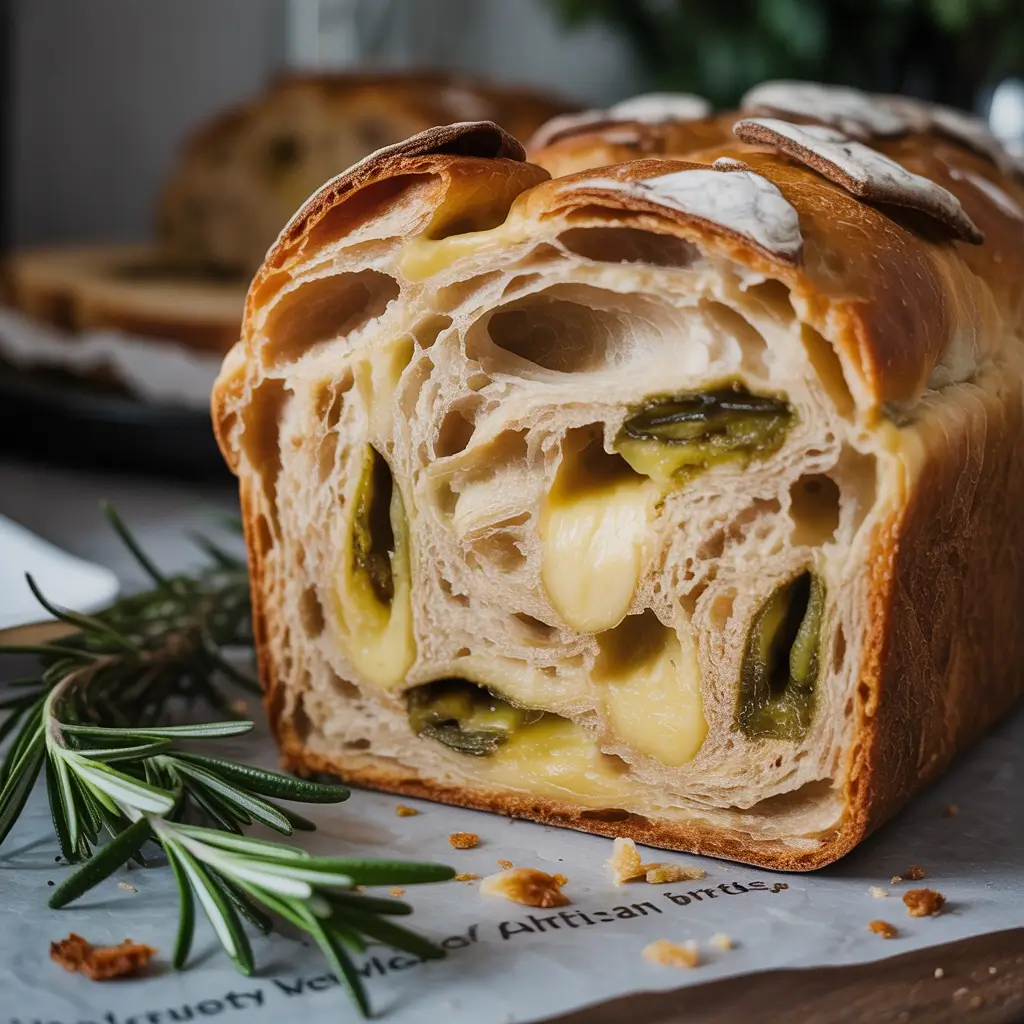
One of the secrets behind successful artisan bread recipes for Dutch oven baking is understanding hydration. Hydration describes the amount of water in relation to the flour in your dough mixture.. A higher hydration level (around 70-80%) yields a moist, airy crumb with those beautiful large holes that define artisan bread.
Many beginner bakers fear working with high-hydration doughs because they can feel sticky and harder to handle. But don’t worry—practice makes perfect. The extra moisture is key to developing that open crumb structure characteristic of professional-quality artisan bread.
When following any artisan bread recipe for Dutch oven baking, pay close attention to hydration guidelines. Slight variations in flour types and climate can affect how much water your dough needs, so adjust as necessary to achieve a slightly tacky, elastic dough that holds its shape.
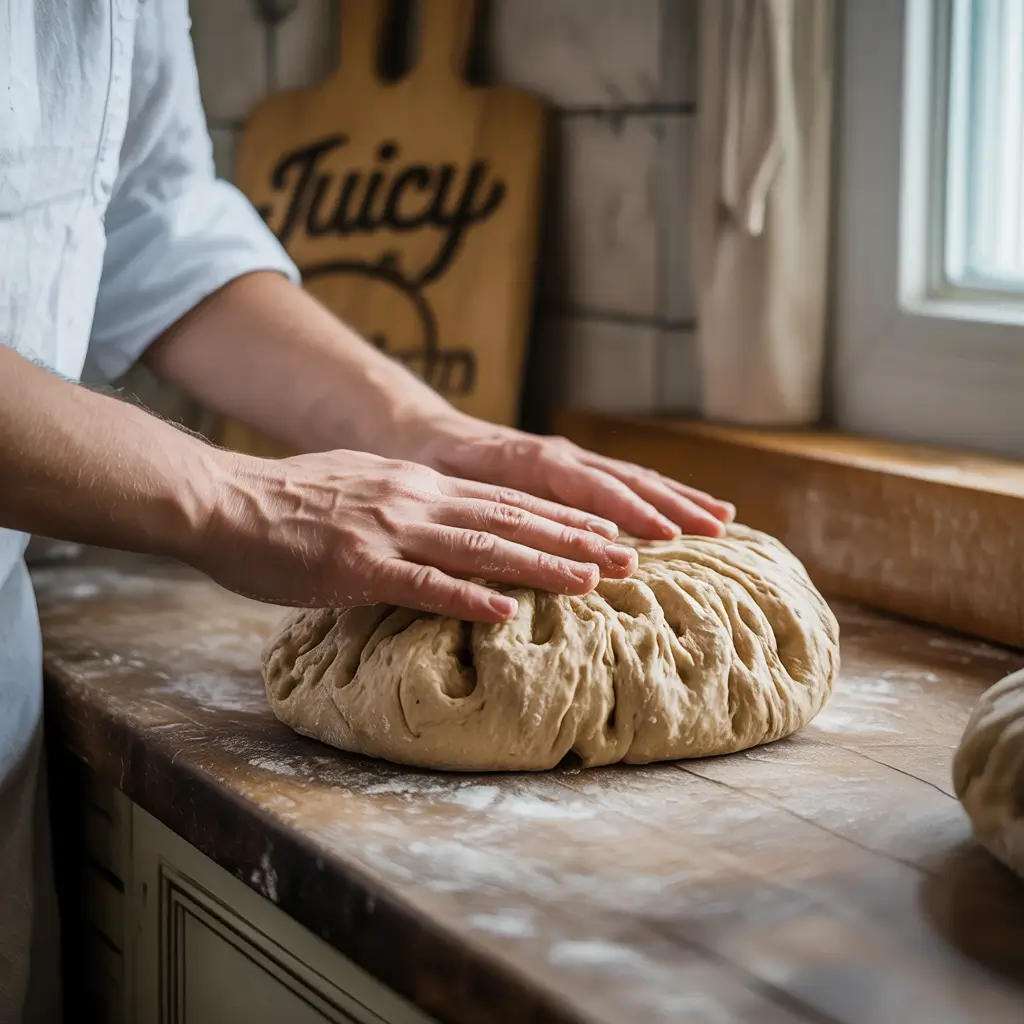
Kneading, Folding, and Shaping Like a Pro
The dough-handling phase is where your artisan bread recipes for Dutch oven really take shape. Kneading builds the gluten network, but with modern artisan methods, long kneading sessions aren’t always necessary.
Stretch-and-fold techniques are widely favored in artisan bread baking. After mixing your dough, you simply stretch one side, fold it over, rotate, and repeat a few times over several resting intervals. This gentle method develops strength while preserving the airy structure.
When it’s time to shape your loaf, keep your touch light. Overworking can degas the dough, reducing those lovely air pockets that define a perfect artisan bread recipes for Dutch oven. Use a bench scraper and lightly floured hands to form a tight, smooth ball, then transfer it to a proofing basket or lined bowl to rest before baking.
Every step you take during dough handling directly affects your final loaf. Mastering these techniques is what transforms a simple recipe into a standout artisan bread recipes for Dutch oven baking perfection.
Try more creative ideas on https://www.zestolla.com/dutch-oven-camp-dinners-guide/
The Science Behind Fermentation and Proofing
The Importance of Bulk Fermentation
Fermentation is where your artisan bread recipes for Dutch oven truly come to life. During bulk fermentation, yeast feeds on the dough’s natural sugars, producing carbon dioxide and alcohol. This not only makes the dough rise but also develops the complex flavors artisan bread is known for.
For most artisan bread recipes for Dutch oven baking, bulk fermentation lasts anywhere from 4 to 6 hours at room temperature, depending on the yeast, hydration level, and ambient temperature. The longer and slower the fermentation, the more nuanced your bread’s flavor profile becomes. In professional kitchens, we often extend fermentation with cold proofing, allowing dough to rest in the fridge overnight to develop deeper, richer flavors.
How Long Should You Proof Artisan Bread?
Proofing—the final rise before baking—is another critical step in artisan bread recipes for Dutch oven success. Underproofed dough results in a tight, dense loaf, while overproofed dough can collapse in the oven, producing flat, gummy bread.
A good rule of thumb: after shaping, let your dough proof until it becomes slightly puffy but still holds its structure—usually about 1 to 2 hours at room temperature. If you’re using the cold proof method, your dough can rest in the fridge for up to 12–18 hours. This not only enhances flavor but also makes scoring easier, as the chilled dough is firmer.
For anyone mastering artisan bread recipes for Dutch oven, patience during proofing pays off. Carefully watch your dough and trust the process—this stage is crucial for achieving that lofty, open crumb and signature crust every baker dreams of.
Baking Artisan Bread in a Dutch Oven
How Long to Bake Artisan Bread in a Dutch Oven?
When it comes to baking, timing is everything. For most artisan bread recipes for Dutch oven baking, you’ll preheat your Dutch oven to a blazing 450°F (230°C) before adding the dough. This high initial heat jumpstarts oven spring, helping your loaf rise rapidly.
The general baking timeline for artisan bread recipes for Dutch oven is as follows:
| Step | Temperature | Time |
|---|---|---|
| Covered Bake | 450°F (230°C) | 20–30 minutes |
| Uncovered Bake | 450°F (230°C) | 15–25 minutes |
Start by baking the bread covered to trap steam, allowing the crust to form properly. After 20 to 30 minutes, remove the lid to let the crust develop a deep golden color. Your loaf is ready when it has a rich, caramelized hue and sounds hollow when tapped on the bottom.
Internal temperature is another reliable guide: fully baked artisan bread recipes for Dutch oven typically reach around 200°F (93°C) in the center.
Temperature Control and Timing for Perfect Crust
The Dutch oven creates an ideal steam chamber, but managing heat correctly ensures consistent results across all your artisan bread recipes for Dutch oven. Always preheat your Dutch oven for at least 30 minutes before baking to ensure even heat distribution.
If your crust darkens too quickly, you can lower the oven temperature to 425°F (218°C) during the uncovered phase. Every oven behaves slightly differently, so make notes on your results for future tweaks. Consistent practice will help you fine-tune your process and perfect your artisan loaves.
In professional kitchens, precision is everything—and that same mindset elevates your home baking. By mastering time, temperature, and steam, you’ll consistently turn out stunning loaves using your favorite artisan bread recipes for Dutch oven.
Storing and Serving Your Artisan Bread
Best Ways to Store Artisan Bread for Freshness
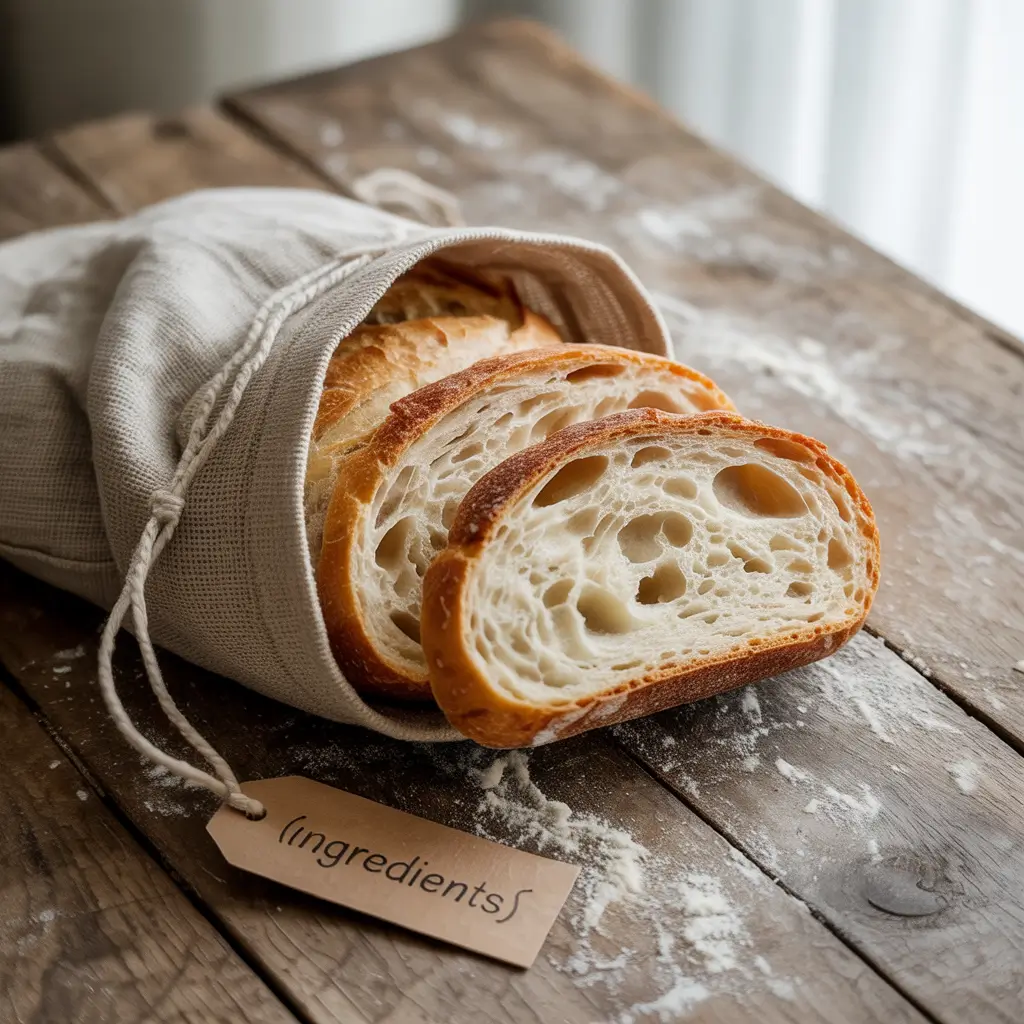
After investing time in perfecting your artisan bread recipes for Dutch oven, you want to keep your bread fresh as long as possible. Unlike store-bought loaves, artisan bread contains no preservatives, so proper storage is key.
For the first 24 hours, store your loaf at room temperature, loosely covered with a clean kitchen towel or in a bread bag. This allows the crust to stay crisp while preventing the interior from drying out. Avoid plastic bags initially—they trap moisture and soften the crust.
After day one, transfer your bread to a paper bag or a bread box to maintain balance between crust and crumb. If you plan to keep it longer, slice the loaf and freeze individual portions. Artisan bread freezes beautifully and can be revived with a quick toast or warm-up in the oven.
Avoid refrigerating your artisan bread recipes for Dutch oven creations. The refrigerator accelerates staling and can ruin the texture you’ve worked so hard to achieve.
Creative Serving Ideas and Pairings
The beauty of artisan bread recipes for Dutch oven baking lies in versatility. A fresh loaf pairs beautifully with:
- Olive oil and balsamic vinegar dips
- Soft cheeses like brie or goat cheese
- Homemade jams and preserves
- Hearty soups and stews
- Toasted open-face sandwiches with avocado, eggs, or smoked salmon
Artisan bread also makes exceptional croutons, bread pudding, or breadcrumbs once it starts to dry out. In every form, it continues to deliver incredible flavor and texture, making every slice worth savoring.
Frequently Asked Questions
How long to bake artisan bread in a Dutch oven?
For most artisan bread recipes for Dutch oven baking, you’ll bake your bread at 450°F (230°C) for 20 to 30 minutes with the lid on to trap steam. Then, remove the lid and bake uncovered for an additional 15 to 25 minutes to achieve that golden, crusty exterior. Always check for doneness by tapping the bottom of the loaf—it should sound hollow—or use a thermometer to ensure the internal temperature reaches about 200°F (93°C).
What makes artisan bread different?
Artisan bread differs from commercial bread due to its handcrafted methods, longer fermentation times, and minimal ingredient list. Unlike mass-produced loaves, artisan bread recipes for Dutch oven often feature open crumbs, chewy textures, and deeply caramelized crusts. The slow fermentation process also allows complex flavors to develop, giving artisan bread its rich, slightly tangy profile.
What is the best yeast for artisan bread?
The best yeast depends on your experience and goals. Instant yeast is a great starting point for beginners—it’s reliable, easy to use, and doesn’t require proofing. Active dry yeast is also excellent but needs to be dissolved before use. For those seeking deep flavor complexity, a sourdough starter introduces wild yeasts and beneficial bacteria, offering a traditional and richly flavored option for advanced artisan bread recipes for Dutch oven baking.
What size Dutch oven is best for artisan bread?
The ideal Dutch oven size for most artisan bread recipes for Dutch oven is between 5 and 6 quarts. This size offers enough space for the dough to rise and expand while maintaining optimal steam circulation for a crispy crust. Larger sizes can work for bigger batches but may not trap steam as effectively for single loaves.
Conclusion: Master Your Artisan Bread Journey
Baking artisan bread recipes for Dutch oven doesn’t require professional equipment—just patience, simple ingredients, and the right technique. With each loaf, you’ll improve your feel for fermentation, proofing, and baking timing, bringing bakery-quality results into your own kitchen.
Looking for inspiration? Try more creative ideas on my Pinterest board or join my community on Facebook for even more artisan bread tips. Your perfect crusty loaf is just one bake away.